Instead of just stating your commitment, a strong proposal shows it. When you use clear visuals, busy reviewers can grasp your solution quickly, remember it later, and trust that you can deliver. Here’s how to write proposals that make your point clear, remove any doubt, and focus the viewer’s attention.
Start with a One-Page Overview
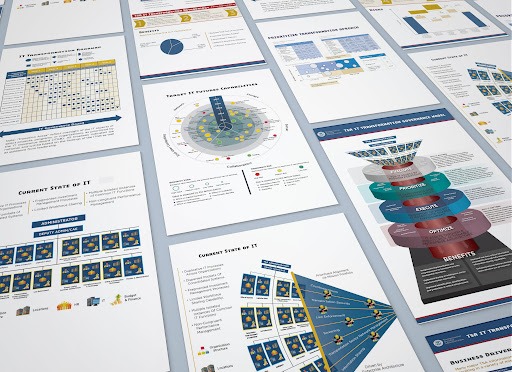
On a single page, summarize the problem, your solution, the outcomes, and the next course of action. Use one anchor image (a mockup or diagram), three to five bullets, a simple grid, and a succinct headline. The plot is introduced on this page, which also gives the reader a mental roadmap for the remainder of the book.
Create a visual hierarchy
Ensure that each page conveys the primary idea in an understandable manner. Use bold subheadings, larger headlines, and consistent spacing to convey priority. Keep text blocks short (45–75 characters per line) and use callouts to break long paragraphs. Nothing will be clear if everything is noisy, so let one element take the lead.
Set a dependable grid
Pick a grid (two or three columns with wide margins) and stick to it. A steady grid creates rhythm, speeds layout decisions, and makes pages feel related. Align text, charts, and images to the same columns so the reader doesn’t have to reorient on every page.
Keep typography tight and readable
Limit yourself to two typefaces: one for headings, one for body. Choose sizes that work across print and screens (e.g., 11–12 pt body, 18–28 pt headings). Use real italics and weights, not stretched or faux styles. Mind line spacing (about 1.3–1.5) to avoid dense blocks that scare readers away.
Use color with intent
Understanding should be guided by color, not embellished. Choose a small color scheme that is associated with your brand and give it meaning: gray for context, green for the desired state, and blue for the current state. Throughout the document, use the same colors for the same ideas. Verify the contrast so that everyone can read the text.
Use basic diagrams to demonstrate how it works
Swimlanes, flowcharts, and system sketches help make complicated steps concrete. Keep shapes simple, labels succinct, and arrows clear. Show the inputs, actions, and outcomes. Break up steps that are too complex to describe in five words. Add a succinct caption that explains the “so what” of the diagram.
Turn data into decisions
Replace walls of numbers with clean charts. Choose the right form: bars for comparisons, lines for trends, stacked bars for parts of a whole (sparingly), and tables only when exact values matter. Label directly, avoid 3D effects, and include the source. End each chart with one sentence that states the takeaway.
Use before-and-after frames
A quick way to clarify value is to show “today vs. future.” For process fixes, show the current flow with red pain points, then the improved flow with green benefits. For interfaces, pair two screenshots with short labels: “4 clicks” vs. “1 click,” “Manual export” vs. “Auto sync.” Keep it side-by-side for easy scanning.
Add realistic mockups and prototypes
If your solution has a user touchpoint, show it. Use device frames, simple wireframes, or a staged photo to place your work in context. Highlight the key action with a circle or arrow. Don’t crowd the mockup; one or two focused screens beat a collage of tiny, unreadable thumbnails.
Callouts and icons, not clutter
Icons can steer attention, but only if they’re consistent and few. Use them to mark sections (Scope, Timeline, Team, Risks) and pair each with a short label. For details that matter, assumptions, dependencies, service levels, use callout boxes. Keep backgrounds light so the main text stays in focus.
Map the plan, not just the promise
Timelines, roadmaps, and RACI charts answer “who does what, and when.” Use a horizontal timeline for phases, a simple table for responsibilities, and milestone markers tied to outcomes. Put risks and mitigations on the same page as the plan to show you’ve thought it through.
Design for both screen and print
Assume your PDF will be viewed on laptops and printed in grayscale. Use vector graphics where possible, set images to 150–300 dpi, and keep file size reasonable. Test a black-and-white print to make sure charts still read. Add bookmarks and a linked table of contents for easy navigation.
Make accessibility a baseline
Use alt text for meaningful images, check color contrast, and avoid tiny type. Don’t rely on color alone to convey meaning; pair it with labels or patterns. Clear design helps everyone, not just a subset of readers.
Close with a crisp action page
End with a summary and a clear next step: a proposed start date, a kickoff agenda, and a contact. Repeat your core benefit in one sentence. Make the button or link obvious if your proposal is interactive.
Quick checklist
- One-page overview up front
- Consistent grid and hierarchy
- Two typefaces, readable sizes
- Intentional, high-contrast color
- Simple diagrams with captions
- Clean, labeled charts with insights
- Before/after comparisons
- Focused mockups in context
- Clear timelines and ownership
- Screen + print ready, accessible
- Strong close with next steps
Design won’t win a weak idea. But thoughtful visuals will make a strong solution unmistakable, and hard to forget.